The creation of letters or mailing labels is one that requires some experience using the products, and using text file import. If you are using Microsoft Word, you should be experienced using Mail Merge.
Select the product you are using:
Using Microsoft Excel
The following screen shots are taken from Microsoft Excel 2013. The procedures for other versions of Excel are very similar.
- Start Microsoft Excel
- Using the Open Dialog Box, navigate to where you have the data file saved, and select "Text Files" from the drop-down list.
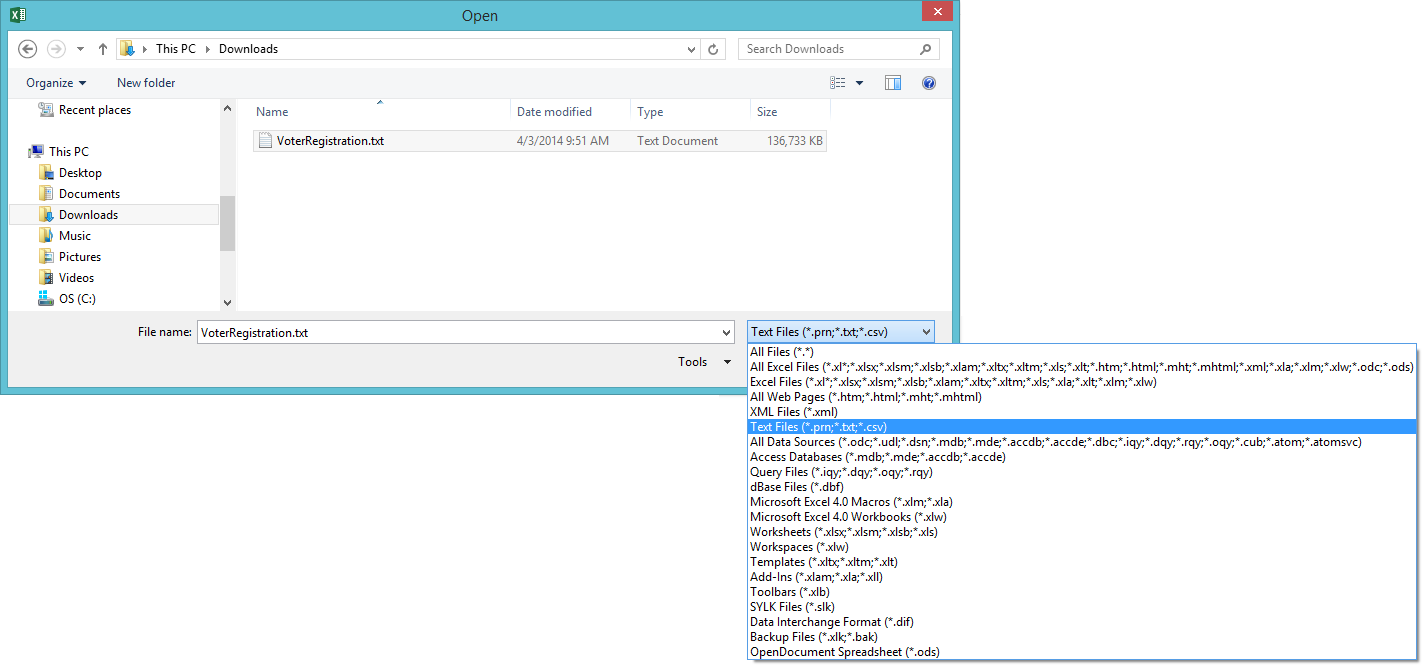
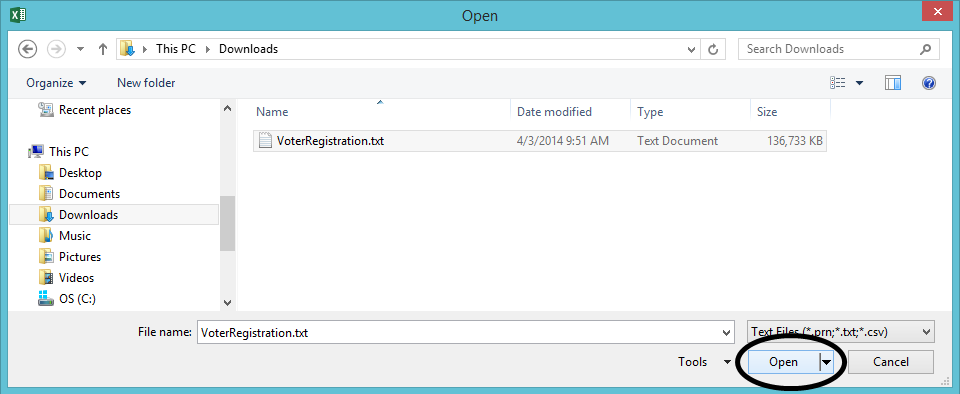
- Once you have done that you will see your data file in the list. Select it and press Open.
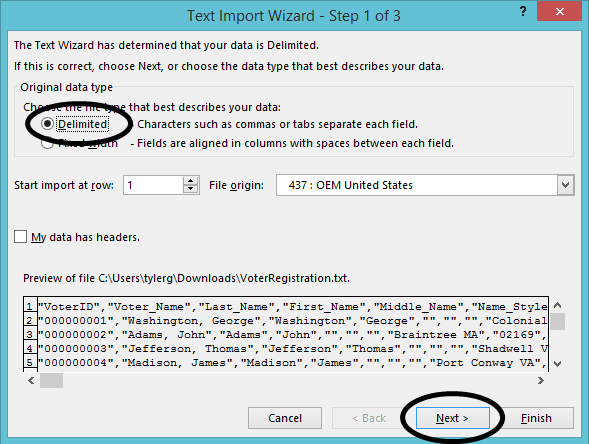
- The Text Import Wizard dialog box opens. Make sure the Delimited radio button is selected, and press "Next."
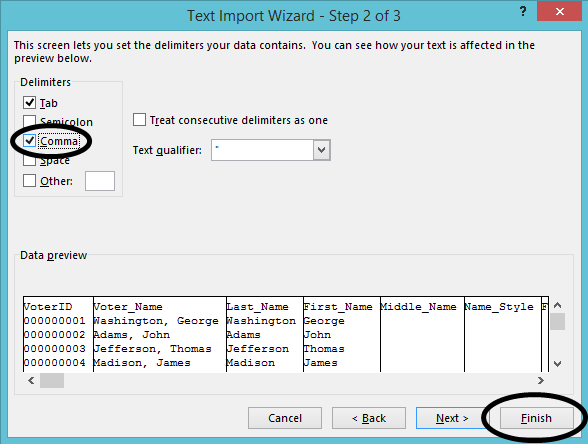
- On the next dialog, check the "Comma" check box, and uncheck the other check boxes in the "Delimiters" frame. Leave the Text Qualifier with the default (") entry in it. Press Finish
Using Microsoft Word to Create Mailing Labels
The following screen shots are taken from Microsoft Word 2013. The principles involved are very similar in other versions of Word.
- Start Word and open a blank document.
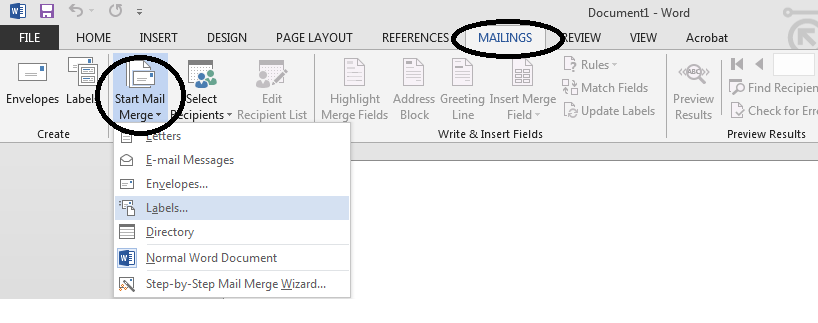
- From the Mailings ribbon, select "Start Mail Merge" and then select "Labels...".
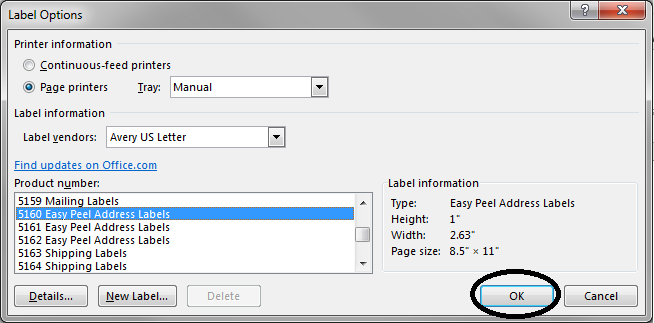
- Select the type of labels you are going to use, and press OK.
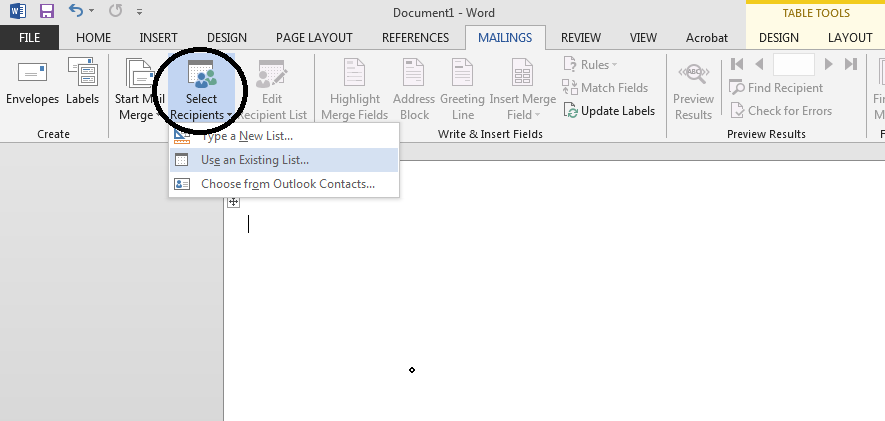
- From the Mailings ribbon, choose "Select Recipients" and then choose "Use an Existing List...".
- Navigate to where your data file is saved, and select it. Press Open.
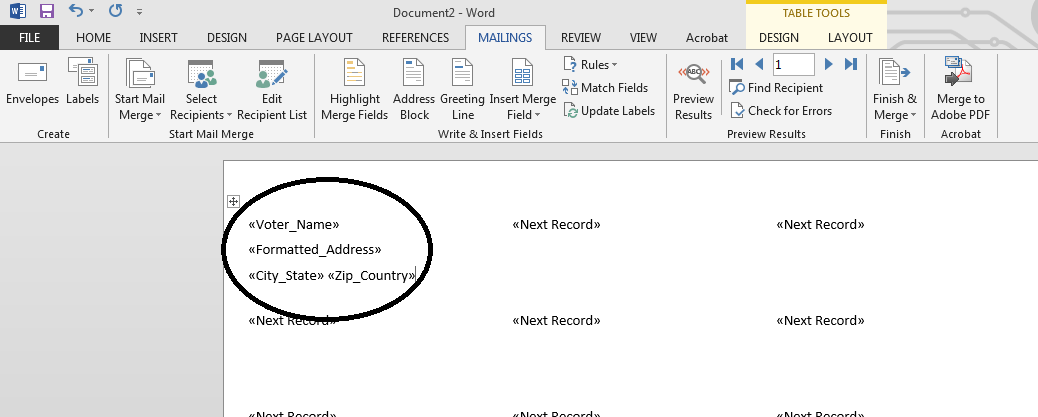
- From the Mailings ribbon, select "Insert Merge Field" and choose the field(s) you want to include in your label.
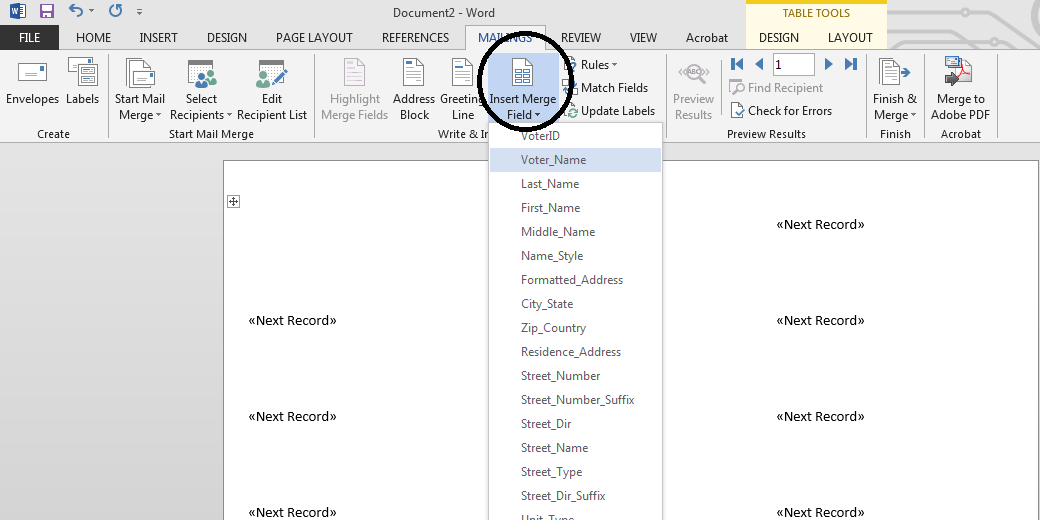
- When you are done, your label will look something like this:
- From the Mailings ribbon, select "Update Labels." The rest of the fields on the page should fill in.
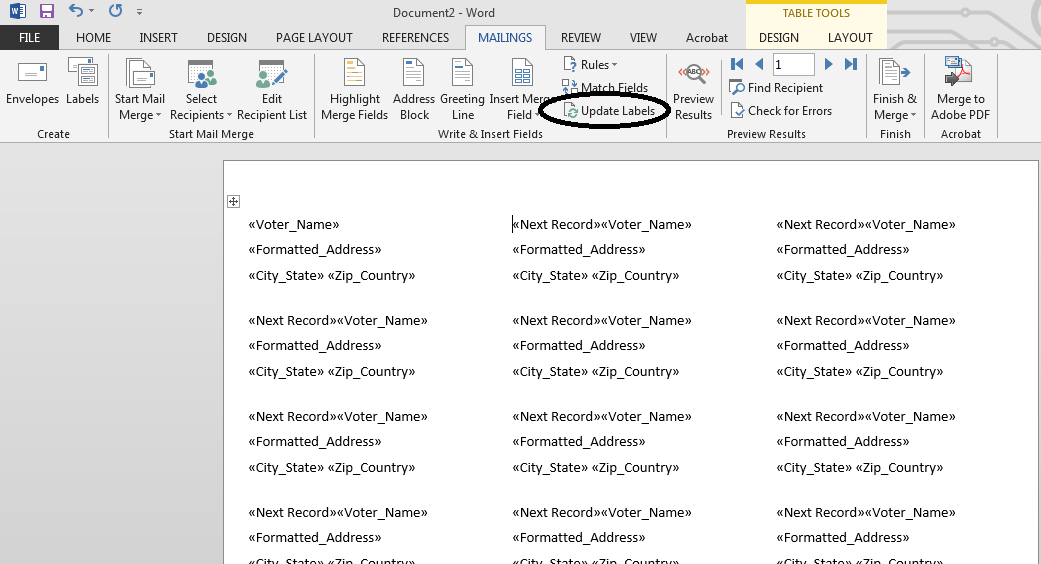
- Press "Preview Results" to verify the data is correct, then select "Finish & Merge" to complete the labels.